
Menus & Navigation
Create and manage menus to organize your site's navigation
Menus and Navigation
Menus are named collections of links that you use to build navigation for your website. A menu can drive the top navigation bar, appear as a sidebar on specific pages, or both.
Understanding Menus
Each menu is an independent entity with a name and a list of items. You create menus in the admin dashboard, then connect them to different parts of your site:
- Top navigation -- One menu is selected to populate the navigation bar at the top of every page. See Top Navigation.
- Page sidebars -- Individual pages can reference a menu to display a sidebar. See Sidebar Menus.
Viewing Your Menus
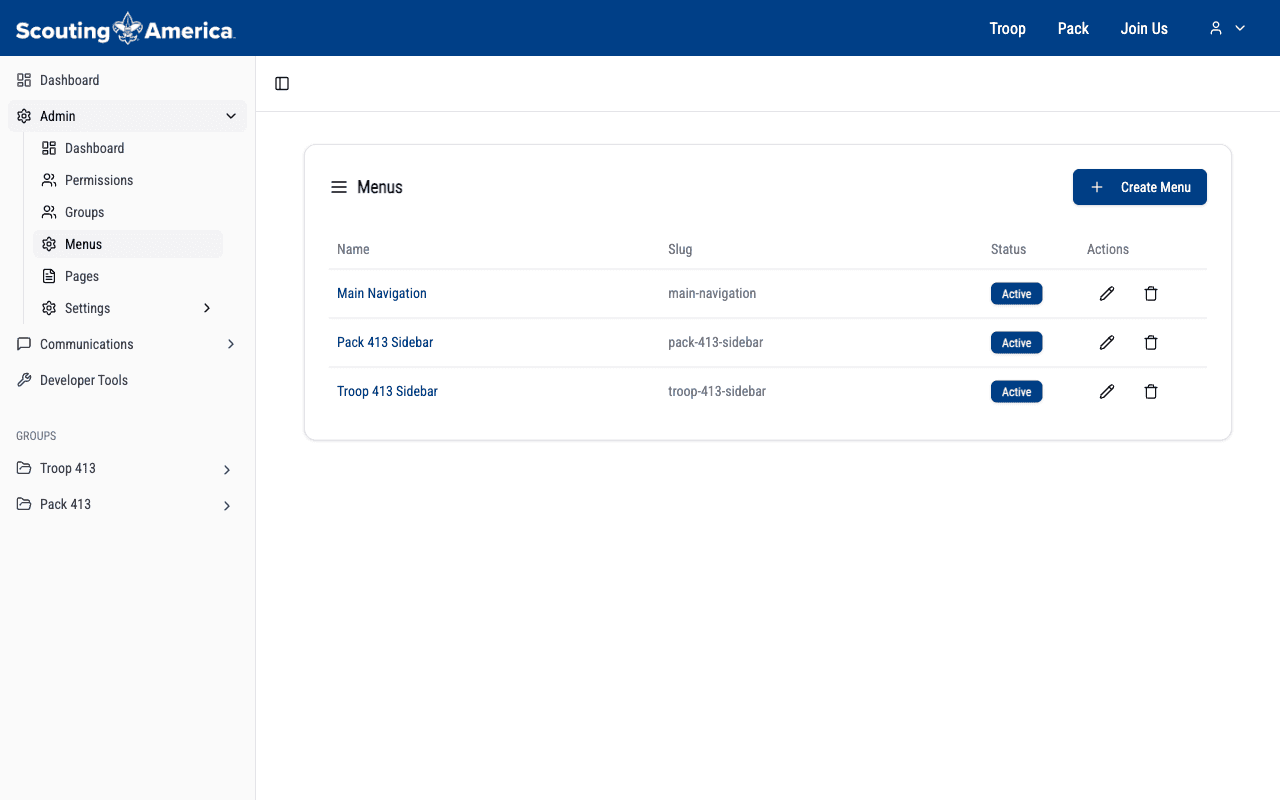
Navigate to /dashboard/admin/menus to see all menus for your organization.
Creating a Menu
- Go to
/dashboard/admin/menus. - Click New Menu.
- Enter a Name for the menu (e.g., "Main Navigation" or "Members Sidebar"). This is the label you will see in the admin dashboard.
- Enter a Slug -- a short, URL-friendly identifier (e.g.,
main-navormembers-sidebar). The slug must be unique across your organization. - Save the menu.
Menu Properties
Each menu has several properties you can configure:
- Name -- The admin-facing label for the menu.
- Slug -- A unique identifier (used internally).
- Active / Inactive -- Inactive menus are hidden from the site. Use this to temporarily disable a menu without deleting it.
- Heading -- Optional display heading shown at the top of sidebar menus.
- Logo -- Optional logo image displayed in sidebar menus above the menu items.
Adding Menu Items
Once you have created a menu, you can add items to it:
- Open the menu by clicking on it in the menus list.
- Click Add Item.
- Fill in the item details:
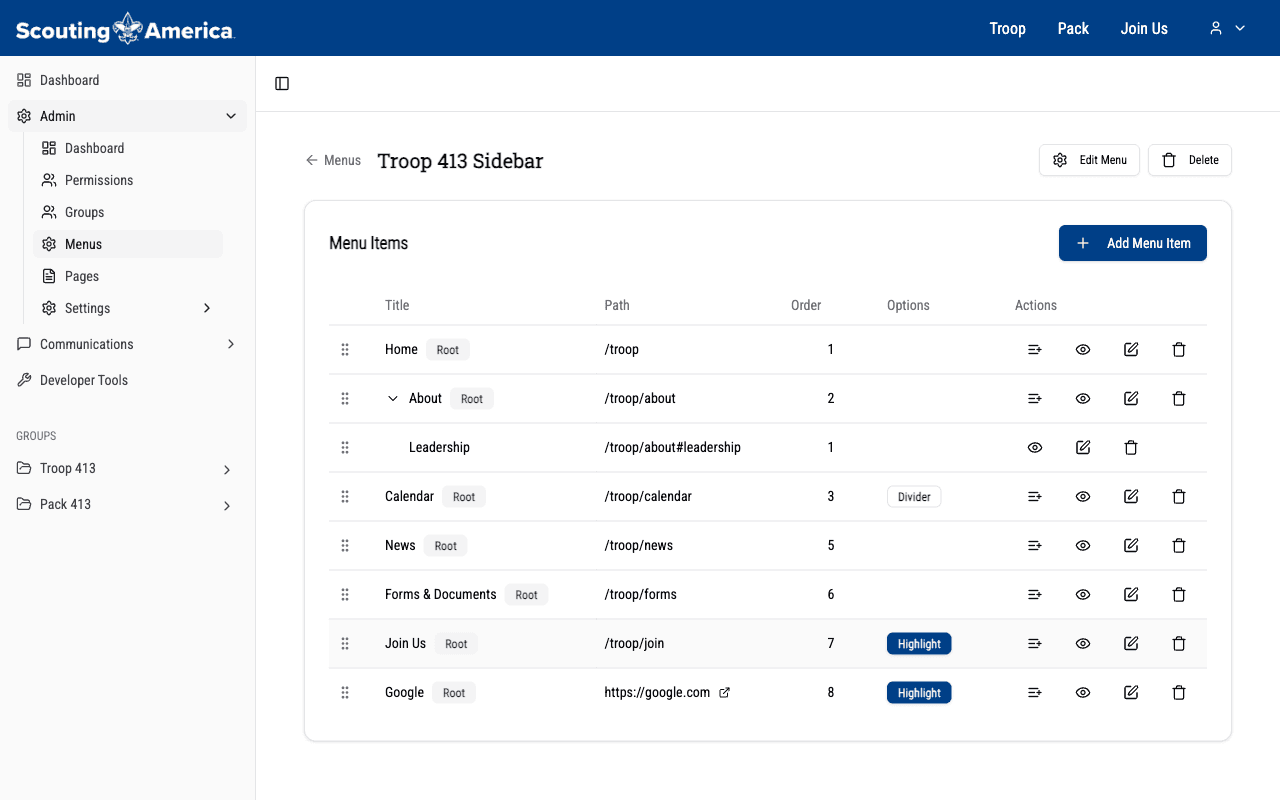
- Title -- The text displayed for the link (e.g., "Home," "About Us," "Calendar").
- Path -- The URL the link points to. This can be an internal path (e.g.,
/troop/about) or an external URL (e.g.,https://scoutingevent.com). - Order -- A number that controls where the item appears in the menu. Lower numbers appear first.
Menu Item Options
Each item has additional options you can set:
- Highlight -- Gives the item a visually prominent style (e.g., a colored background). Use this for important links like "Join Us" or "Register."
- Open in New Tab -- When checked, the link opens in a new browser tab. Use this for external links.
- Divider After -- Adds a visual separator line after this item. Useful for grouping related links.
- Active / Inactive -- Inactive items are hidden from the menu without being deleted.
Hierarchical Items
Menu items support parent-child relationships, both to organize a long menu while editing it and to group related links on your public site:
- A top-level item has no parent and appears directly in the menu.
- A child item is nested under a parent item. Set the item's Parent field to the parent item.
- Child items appear on your public site: in the top navigation they appear in a dropdown under their parent (the parent itself stays clickable), and in page sidebars they appear indented under their parent. The footer is the exception -- it shows top-level items only. That is intentional and permanent: a footer link strip has no room for a dropdown and no affordance to open one.
Nesting goes one level deep. A child of a child is not shown on the public site.
If you make a parent item Inactive, its children disappear from the public site along with it. The child items themselves are untouched -- reactivate the parent and they come back.
Reordering Items
Change the Order value on menu items to control the display sequence. Items are sorted by their order number, with the lowest numbers appearing first. You can use any numbers you like (e.g., 10, 20, 30) to leave room for inserting items later.
Deleting Menus and Items
- Deleting a menu item: Open the menu, find the item, and select the delete action. The item is removed immediately. If it had child items, they are not deleted -- they move up one level, becoming children of the deleted item's own parent (or top-level items if it had none).
- Deleting a menu: From the menus list, select the delete action on the menu. This removes the menu itself. Its items are not deleted -- they remain in the system but are no longer reachable through any menu.
Note: If you delete a menu that is currently used as the top navigation menu, the footer menu, or assigned as a sidebar on any pages, those references will no longer resolve. The top navigation bar will appear empty, the footer will show no menu links, and pages will no longer show a sidebar. Update your settings and pages after deleting a menu.